I saw this great post recently by Donovan Brown. Thought I would take a waltz thru it really quick and share.
Creating a Linux Based Development Box on Azure
It might be a good idea to first create an availability group – add a Storage and a Cloud Service with a good naming convention you like. This way it won’t arbitrarily assign some wacked out names for you and you can delete them later.
-
Open up the Azure Management Portal – the Plus sign on the lower left (Add) -> select Compute -> Virtual Machine -> From Gallery.

-
Look at all these Ubuntu images we can pick from. Select Ubuntu, open up port 3389 for RDP.

-
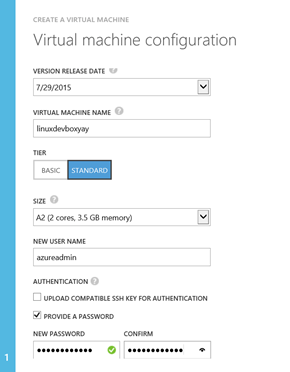
Select A2 for the sizing. I unselected the SSH option and picked out a good strong admin password.
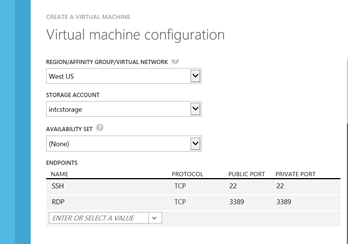
- Pick a good region and your (previously selected) storage accounts. Very important here – open up a port for RDP for 3389. (If you forget, you can also do this later in the Endpoints section of the Azure dashboard.)
- This next portion will take a while. Open up your SSH client of choice – some people like Putty, I like Bitvise. Then enter in the following into command line:
- sudo apt-get update
- sudo apt-get install xrdp
- sudo apt-get install xfce4
- sudo service xrdp start
- sudo apt-get install eclipse
- sudo apt-get install libwebkitgtk-1.0-0
- sudo apt-get install firefox
OK, that’s done. It takes, well, about forever. Once that’s done though you’re about there.
- Use remote desktop to dial onto ____.cloudapp.azure.com.
- R-click on the Panel – Add New Items, select Launcher. R-click, Properties, and add Eclipse. This will drop an icon onto the bottom part of your window.
- Click on the Earth to open up fireFox.
-
Start up Eclipse and select the Help menu. select Install New Software…
- Click Add… enter “TFS Plugin for Eclipse” for the name, and location of http://dl.microsoft.com/eclipse/tfs
- Click Add… enter “TFS Plugin for Eclipse” for the name, and location of http://dl.microsoft.com/eclipse/tfs
- Select Team Explorer Everywhere. Click Next > , and then Next>
-
Accept the Microsoft Software License Terms
- Click Finish
- Click Finish
- Restart Eclipse when prompted
- Close the Welcome page
- Select Window / Open Perspective / Other…
- Select Team Foundation Server Exploring
- Click OK
- Click Connect to Team Foundation Server and follow the instructions to connect.
And that’s it. You’ve got a fully running developer VM running Ubuntu, Eclipse and plugged into TFS – all on Linux.
Some DevOps Links for Today
- You Can’t Change Culture, But You Can Change Behavior, and Behavior Becomes Culture http://vimeo.com/51120539 – Damon Edwards
- Gene Kim – how do we Better Sell DevOps? http://vimeo.com/65548399
- I also like the no horse crap video https://www.youtube.com/watch?v=g-BF0z7eFoU
- DevOps resources and links – http://www.itproguy.com/top-2014-microsoft-devops-learning-resources/
