Recently I’ve been asked to do some complete demos of building out complete release pipelines similar to what Donovan and company have been doing for at least a year now. My craptop has been bottoming out lately and I’ve sworn to “walk the walk” when it comes to making the leap from Visual Studio local on my box to editing/pushing out code using Visual Studio Team Services (VSTS). As VSTS has changed quite a bit since I last looked at this, I thought I’d write up my walkthrough notes so you can do it yourself. Trust me – setting up CI/CD is now LAUGHABLY easy. There’s really no excuse not to try it with your new application.
If you want more information on ARM templates, setting up release definitions, build agents etc – check out the “Zero to DevOps” epic presentation by Donovan Brown showing what was behind the scenes. Note the first comment is about adding SSDT/SSIS as part of the buildout as a suggested feature, I would love this!
In Brief
-
First lets set up some code to import.
- Log onto VSTS
- import code from https://github.com/adventworks/aspnet4-sample
- Create four websites in the Azure portal you want to point to. Let’s create a D, Q, and P set of sites.
-
Now let’s set up a build.
- Set up build – ASP.NET. Call it “XXX_CI”, select repository
- Click on the Trigger tab, and select “Enable CI”
- Click “Save and Queue”
-
Associate this build with a release:
- Release tab – create a new release definition. When it asks you for the target environment name, give it a name – “Dev” – Azure App Service Deployment template, and select Apply.
- Click on Artifacts – select your project, and the “XXX_CI” build definition.
- Enable CI by clicking on the lightning bolt on the artifact, top right.
- On the Artifacts object – select the “dev” environment. Select the dropdown on the subscription to pull in your Azure subscription. Here we are going to point ot “Phoenix360D”, our destination dev website.
- Then we edit the index.cshtml file and add some nonsense verbiage. Pull it up in the site – and voila! Any changes we are making flow instantly through to dev where they can be tested.
See below for notes on setting up multiple deployments and creating a DevOps Project.
Full Walkthrough Notes
Note there’s not one original step in here, I just walked thru the steps in this doc like a good, obedient zombie.
Creating Your Environments
First go into the Azure portal
- Log onto portal.azure.com
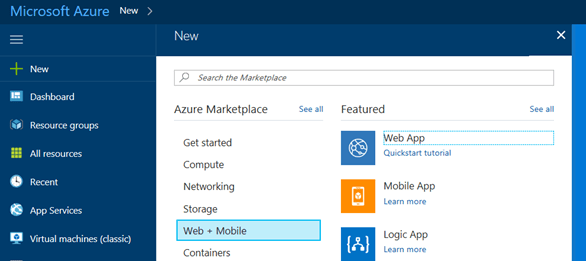
- Create three new websites by clicking New -> Web + Mobile -> Web App.
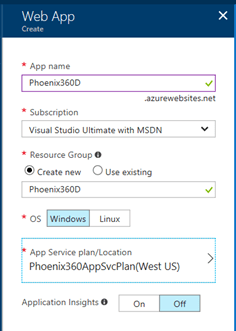
According to the notes here – https://docs.microsoft.com/en-us/azure/app-service/azure-web-sites-web-hosting-plans-in-depth-overview – you only need to create a new app service plan if a given app is resource intensive or you need to scale it independently. That’s not the case here – we can use one app service plan for all four environments (XXXAPPNAME + D, Q, P). In contrast, the idea behind resource groups are – you update them as a group. They share the same lifecycle, permissions, and policies – you can update security to this batch of resources as a group for example. So we’ll be creating one app service plan, four diff resource groups. We’ll create three websites – see below for “Phoenix360D” – with the appendix -D, Q, P – dev, QA, production.
Depending on current demands Azure should spin each of these up in a few minutes. Now we’re good to go, all 4 environments have been spun up and are running on Azure. And we have a build running successfully.
Getting Our Build Started – Single Path
Next, we need some code to work with. If you don’t have your own, no worries, we can give you a very nice working sample complete with test scripts.
-
Log onto VSTS and click on your Code tab. Import using https://github.com/adventworks/aspnet4-sample – see the nice screenshot below:

-
Once this is done – you should be on the Code tab – select the “Setup build”button on the right. Select “ASP.NET (PREVIEW)”, and select APPLY.
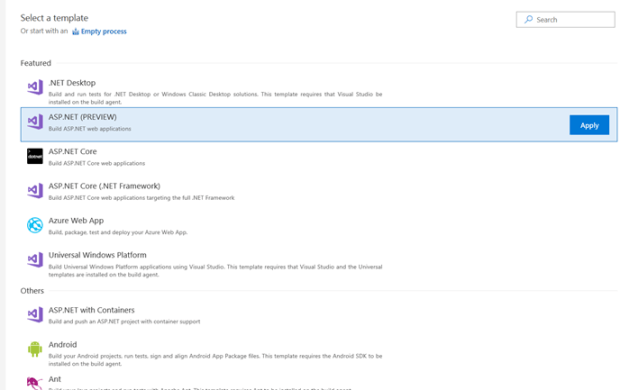
Side note, check out all the steps it stubs out for you below on the left. Whoa!


- Give the resulting template a good name– I chose Phoenix360_CI – and select your repository you just created. Here I’m using a Hosted 2017 build agent but you could also use your onprem TFS2017 build agent if you so desire.
-
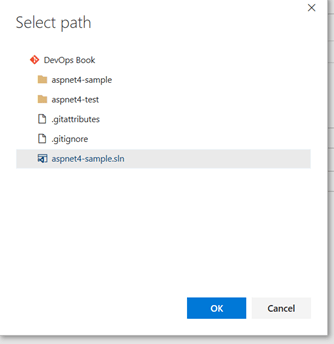
And, last, I select the repository we just imported:
-
From here I can almost see the end of the tunnel – click on Triggers and enable the trigger for continuous integration. (Note you can also set scheduled builds at a particular time of day on this tab.)

- Click on Save & Queue, top right. Enter some notes on your commit, and on the popup window click Save & Queue again.

- If you’ve done this right – you’ll see the following in your build definition:
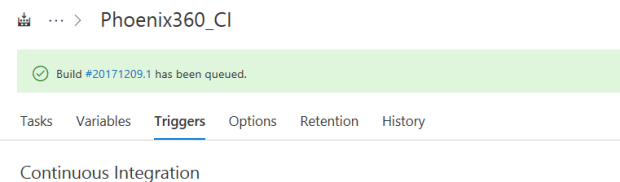
- Who, that build URL there is just begging to be clicked on. Let’s click on this:
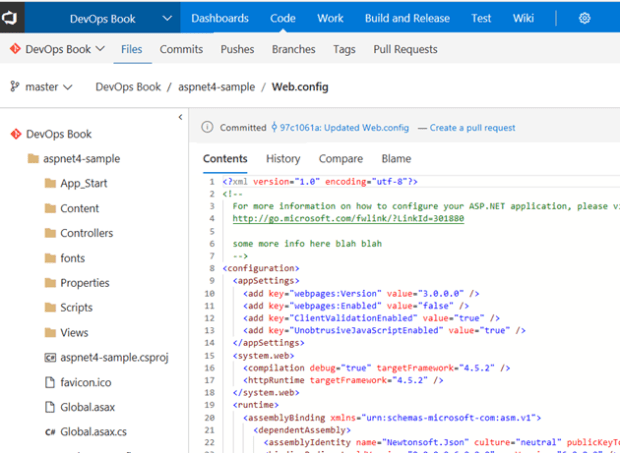
- To test if this is working – go into Code again and make a hand edit to a web.config file, in the header. If we’ve done this right, we should be seeing a build kick off after our commit of this change:
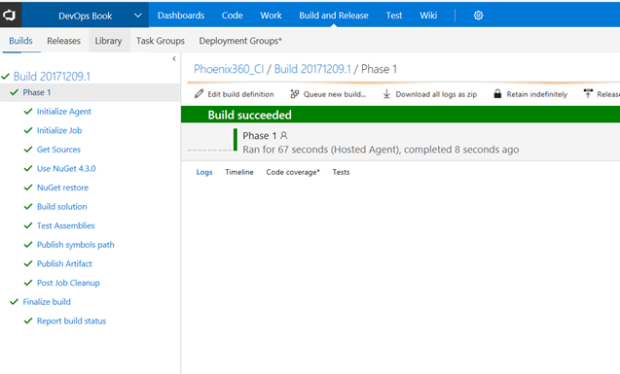
Click on Build and Release tab. Sure enough, our code commit triggered a build:

-
This is really quite nice – click on the latest build, and select the Test tab for example. It shows us the tests and the run length:

- Click on the Release tab and add a new release definition. There’s a few templates to choose from here but it’s definitely easy to start with a precreated template vs rolling your own. Let’s click on “Azure App Service Deployment” and select Apply.

- Don’t get overwhelmed – just click on the Add Artifact option. Enter in the following values – the Build Definition you created earlier. Note the different version options as well in the dropdown:

-
On the Artifacts node you just created – left side – notice that little lightning bolt on the top right? That’s our continuous integration trigger. Let’s click on this and make sure CI is all set up:
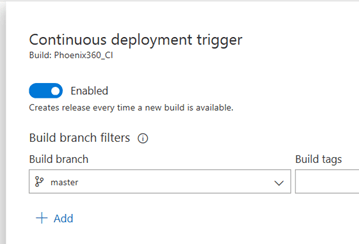
And then click again on that Artifacts node on the right, and set up your environment including the destination endpoint:

Create a new release – as you see below – and save it to the default folder. We’re golden!

Does it work? Let’s go into the code view and make a change. It should populate out to dev:

Setting Up Multiple Deployment Paths
Continuing with this wiki:
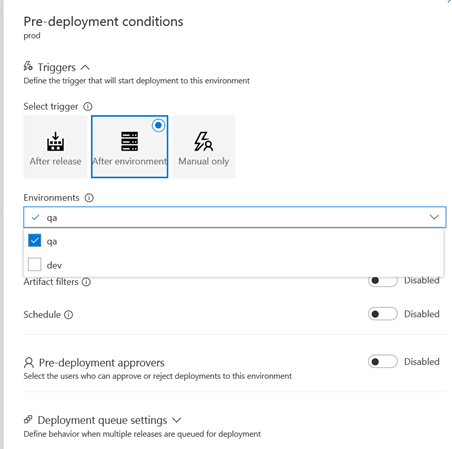
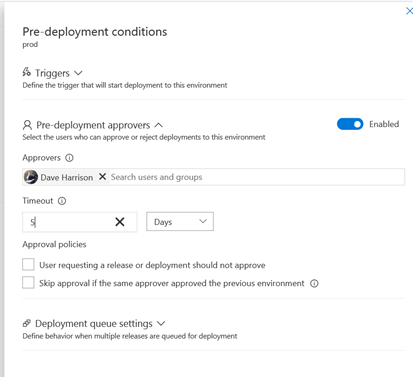
See below. Clone your dev item – and set it up so the pre-event trigger (lighting bolt, left side) is set to “After environment”. This is also where you can set up approvers and manual stage gates.

Clicking on the pre deployment conditions lets me set the deployment to trigger after the environment is ready or based on a release trigger (i.e. a simultaneous rollout to DEV/QA). You could also set your production rollouts to a less busy time of day for example.
Then I go into each task for the new cloned environments above and change the deployment pointer to QA (or Prod).
Let’s get fancy and change the deployment to prod to be manual.
Now when I create a release – look how nice this is:
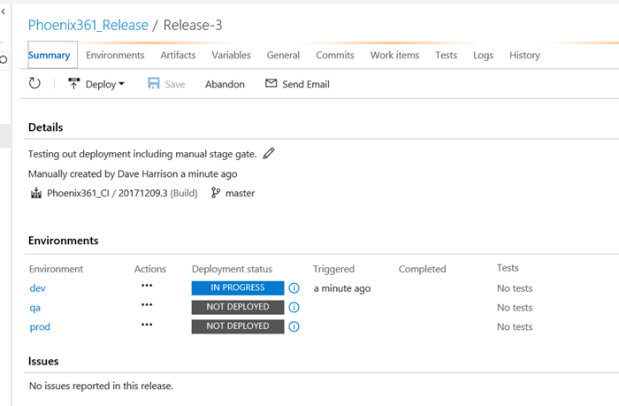
And sure enough when it hits prod I get this nice little alert that I need to review the changes and approve a move to prod.

Sure enough, now any changes to my source control kicks off a full set of releases out to all 3 environments. Noice!!!!

DevOps Projects
Log in to VSTS.
Create a new DevOps Project. New (top left), Everything, and filter by “devops”. You should see the DevOps Project below appear.
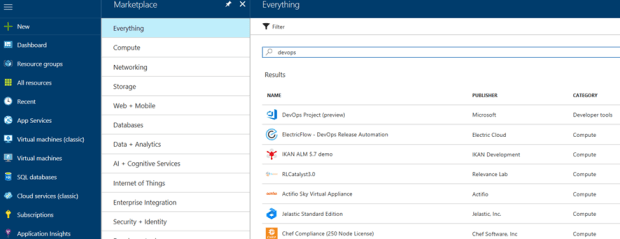
Let’s select .NET below. But we could import our app or use a ASP.NET site based on PHP, NodeJs, Java, etc.
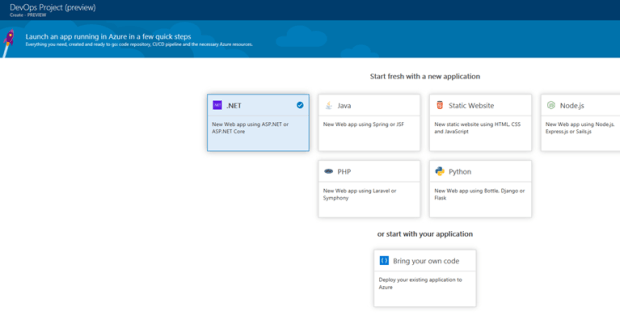
On the next screen choose either ASP.NET or ASP.NET Core. Select Web App in the next window – it’s the only option as yet. Lastly choose your existing MSDN subscription – assuming you have one – and a new project name.

I’ll next see a “Deployment in Progress” notice in the taskbar. Super cool!

… and at last I get this shininess.

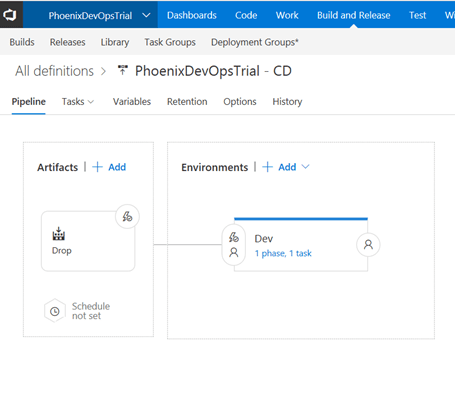
There’s no magic going on here. You can browse to the Build definition and inspect what its doing – and then click on the Dev release and edit the properties. See? It’s exactly what we created before, manually.
Really I’m very glad that I took the time to do this manually first. It really gives me more of a comfort level when it comes to setting up release pipelines manually.
Dead ends and miscellany
An annoying issue was in the Artifacts, when I’m trying to point to the correct environment, it kept blowing up with “Couldn’t authorize to AAD. If popup blocker is enabled in the browser, disable it and retry again.” I tried changing adblocker in Chrome but that didn’t fix anything; same with Edge. But, classic IE got me a little further. This doc gave two options – https://docs.microsoft.com/en-us/vsts/build-release/actions/azure-rm-endpoint. I tried to log in but the “User May Add Integrated Applications” under the classic portal was already set to Yes. Tried again in Chrome, went to Release and tried adding a new Azure Resource Manager Service Endpoint. Turns out that wasn’t what it needed anyway.
I also had some subscription issues, where my default directory needed to be changed – that was really killing this walkthrough. Good news was – I submitted a ticket, Sev A, and got a call back from a very competent subscriptions helpdesk person in about two hours. Excellent. Really, I was quite impressed, it totally fixed a very longstanding issue.
Helpful sites to do this yourself
- For people that like blogs – first official announcement
- Hub on Azure Deploy projects – https://docs.microsoft.com/en-us/vsts/deploy-azure/, and an Ignite overview on the topic.
- Create one build to DEV: https://docs.microsoft.com/en-us/vsts/build-release/apps/cd/azure/aspnet-core-to-azure-webapp?tabs=vsts#create-webapp-portal
- Now add on to it with QA/PROD: https://docs.microsoft.com/en-us/vsts/build-release/actions/define-multistage-release-process?toc=/vsts/deploy-azure/toc.json&bc=/vsts/deploy-azure/breadcrumb/toc.json
- Deployment slots are cool – you can deploy to staging, and once you’re good and ready you swap with PROD for zero-down rollouts. Good, but even better when you roll out in rings or canaries as we do with VSTS.

How long have you been working on this? Are there any other suggestions that interest you?